Python is a versatile programming language that is comparatively easier to learn and program. One of the advantages of Python is that there are a host of libraries that the user can install on their system so that they don't have to code from scratch.
These libraries are updated time and again to make sure everything is working smoothly. But there can be occasions where some libraries might become incompatible with each other due to an update in one library.
You can use this article to set up your local Python environment which is similar to the Quantra portal. The Quantra portal contains all the recommended packages for quant analysis and algo trading.
This blog covers the following sections. If you are already familiar with Anaconda installation or have already installed Anaconda, then you can straight away go to the ‘Set the Python Version and Install Packages’ section.
If you want to explore a particular issue, you can head directly to the links below:
Python Installation Steps
Install and Run Anaconda
Set the Python Environment
For Quantra users
- How to Run Files Included in the Download Section of Quantra Courses
- What are Different File Types in data_module?
- Troubleshooting Notebooks
- How will you access the CSV files stored in the data_modules?
- How to access the functions stored in the data_modules folder?
Anaconda helps you in organising your code, write simple explanations to the code in markdown cells, as well as give control over how the program should be run.
You can also use the Anaconda prompt to install Python packages easily.
Install Anaconda on Windows
If you have already installed Anaconda, you can skip the sections and head straight to the section on setting the python version.
Remember that each environment you create will have a particular name. Right now it is "base".
You can head to the ‘Set the Python Version and Install Packages’ section now. If Anaconda didn't install correctly, head to this section.
Install Anaconda on Mac
Remember that each environment you create will have a particular name. Right now it is "base".
You can head straight to the ‘Set the Python Version and Install Packages’ section now. If Anaconda didn't install correctly, head to this section.
Troubleshooting Anaconda Installation Issues
One of the common issues we have encountered while installing Anaconda is the issue of file location. It is generally recommended to install Anaconda where you are installing Python.
Sometimes, your system might not be able to install Anaconda due to the system requirements. In that case, you can pick one of the earlier versions from this link.
Now that Python and Anaconda have been installed, we will modify the Python environment to the same environment used by Quantra. Let us see the process in the next section.
Set the Python Version and Install Packages
Let us not now create an environment in Python using the Anaconda prompt.
The commands you have to type are listed below:
1. For creating new environment:
conda env create -f https://quantra.quantinsti.com/downloads/machinelearning/environment.yml
2. For activating new environment: conda activate quantra_py
3. For opening Jupyter notebook in new environment: jupyter notebook
Now you can open any notebook and start working on it right away.
Troubleshooting Tips For Setting Environment
While installing the packages, you might get an error message saying “Windows C++ or higher is needed to install packages. You can simply copy-paste the link and download the build tools.
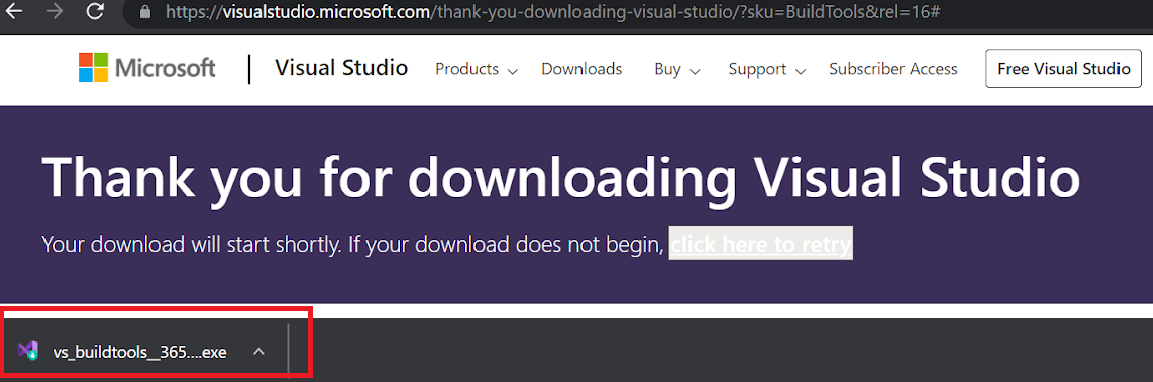
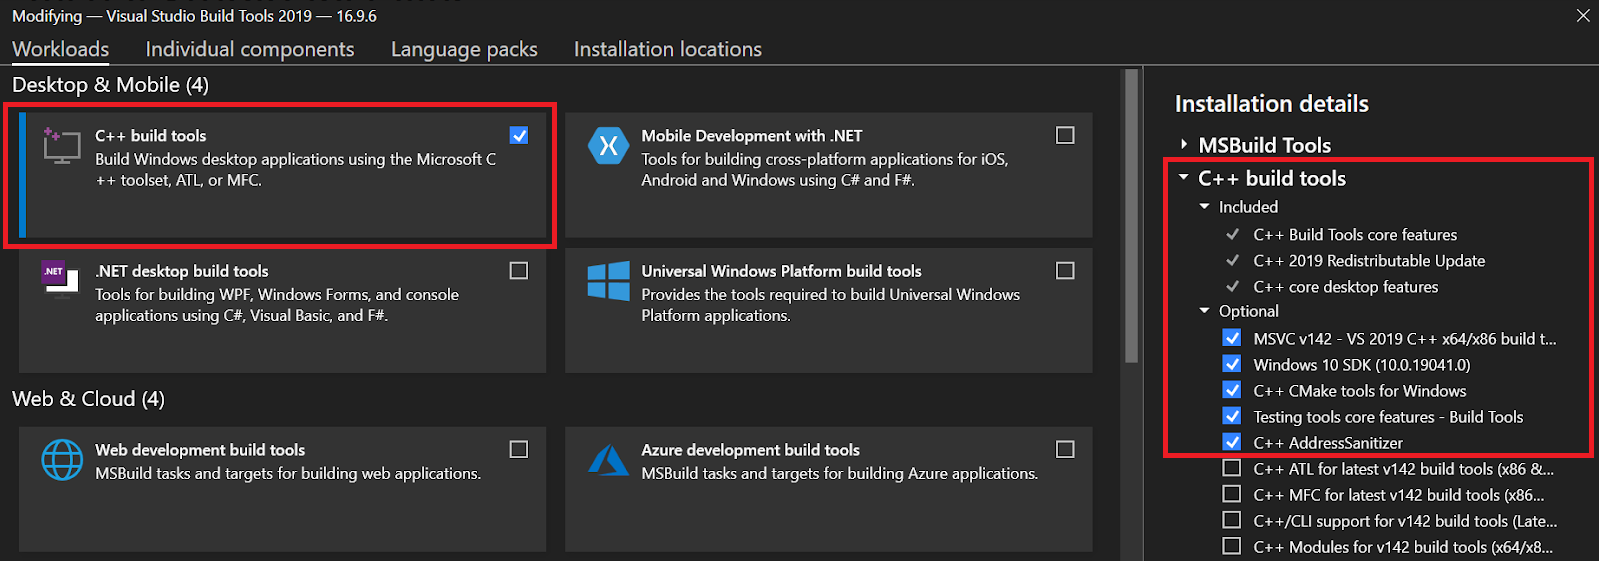
Click on the setup file and make sure you have selected the “C++ build tools” checkbox and further selected the 5 “optional” tools as well, as seen in the screenshot below.
Follow the instructions during setup and the required packages will be installed. You can then try installing the Python packages again, and this time the set-up will be complete.
For an optimum user experience, you should extract all the files to the root directory where Python is installed. For example, if the Python installation is in the folder “C:\Users\rekhi”, then extract the files to this folder itself.
If you want to remove an existing environment, you can do it in the following manner.
- Deactivate the environment
- Run the following command: conda remove --name quantra_py --all

Note: Here, the environment name is "quantra_py". You can write the name of the environment which you want to remove.
Once the environment is set up, you can run all the notebooks in the downloaded zip files from your course.
Let us now see the different files present in the zip folder of a Quantra course.
Exclusive Section only for Quantra Learners
How to run files included in the download section of Quantra Courses
What are Different File Types in data_module?
Data files: These are text files that contain alphanumeric data. Quantra provides certain financial data in the form of CSV, bz2 or pick files so that the user does not have to download the data every time from a web resource.
For example, the “infy_dv.csv” file could contain the OHLC data for the year 2018.
These files can be of the format csv, bz2 or pick. But the way to use them is the same, using the pandas method.
Modules or file with an extension of .py: Quantra collates all the code which is used repeatedly, such as calculating the strategy returns, in a function, which is stored in the modules. In this way, instead of writing the same lines of code in every notebook, you can simply call the function defined in the module file.
In this way, you have received all the data files as well as the strategy notebooks for your analysis. Thus, you don’t have to spend time making sure everything runs. Rather, you can devote your time optimising and tweaking your strategy, in order to start trading systematically.
Troubleshooting Notebooks
1. Before you set up the environment, make sure the Python version which you have installed is the correct one. You can check the version by typing “python” in the command prompt.
2. If you face a “ModuleNotFound” error, then you can fix this by installing the required package.
3. If you face a “FileNotFound” Error, you may not have written the correct file path.
What to do if you still face an error in running the code provided in the Quantra course?
You can always post your query to the community page where like-minded people like you are learning Python and answer each other’s queries.
How will you access the CSV files stored in the data_modules?
You can go to any folder and open the Jupyter notebook. In that you need to write following code to access the file
1. Import Pandas library
import pandas as pd
2. State the path of the data file correctly.
For example, “infy_dv.csv” is stored in file location “C:\Downloads\Python-for-Trading-Basic-Resources\data_modules”, and the notebook “Data Visualization.ipynb” is in the folder “C:\Downloads\Python-for-Trading-Basic-Resources\Importing Data and Data Visualization”.
You would need to go one folder above the notebook location and enter the “data_modules” folder. Here ”..\” indicates we are going one folder above the notebook location.
’..\data_modules’
Then, you will write “..\data_modules\name of the file” you want to access.
The code will be as below:
infy = pd.read_csv('../data_modules/infy_dv.csv')Here, infy is the dataframe where we store the contents so that we can analyse it later.
How to access the functions stored in the data_modules folder?
The functions can be accessed in the same manner as importing libraries. But there are a few extra steps. Let us go through them now:
1. Let’s say the function “analyse performance” is stored in the “ST_functions_quantra.py” file. As specified earlier, the module is in the data_modules folder. The location is given as .“C:\Downloads\Python-for-Trading-Basic-Resources\data_modules”, and the notebook “Data Visualization.ipynb” is in the folder “C:\Downloads\Python-for-Trading-Basic-Resources\Importing Data and Data Visualization”.
2. You would first write the line
“import sys” which will help you in importing functions in modules.
3. You would then write “sys.path.append(“..”)” so that we can add a specific path for the interpreter to search.
4. Finally, we specify the name of the file and function we want to import. Here the name of the file is "quantra_functions" and the function name is "analyse performance".
Thus, the code will be as follows
from data_modules.quantra_functions import analyse performance
In this manner the function will get imported.
Summary
You have started the journey in the world of algorithmic trading. First, you installed Python and Anaconda Navigator. You have then installed all the necessary libraries which will aid you when you are performing backtesting and analysing your own trading strategy. You have also seen the different data files which are used in Quantra courses so that you can minimise the time required to retrieve data while backtesting. Finally, the environment you have set up is the same as Quantra, and thus, you will have minimal errors while using any of the course strategy notebooks.
Disclaimer: All data and information provided in this article are for informational purposes only. QuantInsti® makes no representations as to accuracy, completeness, currentness, suitability, or validity of any information in this article and will not be liable for any errors, omissions, or delays in this information or any losses, injuries, or damages arising from its display or use. All information is provided on an as-is basis.